
Tip #1 Clipping Paths
K. So I realize it has been over two weeks since I said I would start posting tips in here! :) So I guess I had better live up to my word! ;)
The first tip that I want to talk about is using Clipping Paths. Now this may be fairly obvious to some of you; but for those that have not unleashed the power of the clipping path, well my friend you just do not know what you are missing!!
So what is a clipping path? Technically; A clipping path is a vector path which allows part of an image to show while hiding the rest of the image, effectively rendering part of the image transparent. Say WHAT?
Well, it breaks down like this : )
Let's say you have some word art, and you want to either change it's color, or maybe apply some paper to it. Well, you could just make a brush out of it and then go from there; but.. If you apply a clipping path to it.. Well, the possiblilites are just about endless ;)
MINI TUT TIME:
1. First start by downloading this word art. Open it up in Photoshop, and then chose one of your favorite papers.
2. Next drag your paper over the top of your word art.
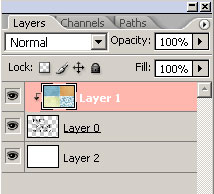
3. Now there are several ways to create a clipping path. (like all things Photoshop!) You can;
Use your keyboard short cuts:
In CS2 = Ctrl+Alt+G
CS or lower = Ctrl + G
Or Hold down your ALT button while you click between the two layers in your layers palette; (When you do this your mouse pointer changes into the little Clipping Path Icon)

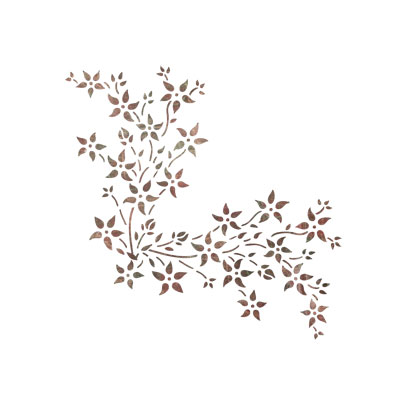
You may not realize yet what a cool little trick this is. This is a great way to paint shapes and word art. Load your favorite grungy brushes; create a new layer on top of your shape or word art layer; Create your clipping path and now start painting. Your brushes will only paint inside the path. That is how I created these little rub on images from My Gypsy Rose Kit.

I also used a clipping path to layer paper and paint over this custom shape from my Chelsey's Dream kit to create a collaged effect:

Clipping paths are also a fast and easy way to wrap ribbon. Drag your ribbon on top of the photo or paper you want to wrap; Create a clipping path and Viola; No erasing required ;) Finish your ribbon off with just a little burning; Load a soft edge brush into your Burn tool; change the range to Highlights with the exposure around 20-25 and just lightly burn in some shadow on the egdes.
So play around with Clipping Paths, you will be happy you did! :)
The first tip that I want to talk about is using Clipping Paths. Now this may be fairly obvious to some of you; but for those that have not unleashed the power of the clipping path, well my friend you just do not know what you are missing!!
So what is a clipping path? Technically; A clipping path is a vector path which allows part of an image to show while hiding the rest of the image, effectively rendering part of the image transparent. Say WHAT?
Well, it breaks down like this : )
Let's say you have some word art, and you want to either change it's color, or maybe apply some paper to it. Well, you could just make a brush out of it and then go from there; but.. If you apply a clipping path to it.. Well, the possiblilites are just about endless ;)
MINI TUT TIME:
1. First start by downloading this word art. Open it up in Photoshop, and then chose one of your favorite papers.
2. Next drag your paper over the top of your word art.
3. Now there are several ways to create a clipping path. (like all things Photoshop!) You can;
Use your keyboard short cuts:
In CS2 = Ctrl+Alt+G
CS or lower = Ctrl + G
Or Hold down your ALT button while you click between the two layers in your layers palette; (When you do this your mouse pointer changes into the little Clipping Path Icon)
You may not realize yet what a cool little trick this is. This is a great way to paint shapes and word art. Load your favorite grungy brushes; create a new layer on top of your shape or word art layer; Create your clipping path and now start painting. Your brushes will only paint inside the path. That is how I created these little rub on images from My Gypsy Rose Kit.
I also used a clipping path to layer paper and paint over this custom shape from my Chelsey's Dream kit to create a collaged effect:

Clipping paths are also a fast and easy way to wrap ribbon. Drag your ribbon on top of the photo or paper you want to wrap; Create a clipping path and Viola; No erasing required ;) Finish your ribbon off with just a little burning; Load a soft edge brush into your Burn tool; change the range to Highlights with the exposure around 20-25 and just lightly burn in some shadow on the egdes.
So play around with Clipping Paths, you will be happy you did! :)
posted by Michelle at 1:52 PM
25 comments
![]()