Quick Zoom; and the Color Dropper Tool
Oh, I have not been faithfully updating this! :)
K. I promise to get better!
I am determined to share my Photoshop knowledge with you all!
SO, to make up for it; Here is a couple of tips in one post :) YEAH!
They are just small, but they can be mighty helpful..
1st Tip:
If you are working on a layout and you need to zoom to view it at 100% a quick and easy way to do that is to double click on the zoom tool. This zooms your image to view it at 100% instead of the measly 15-25% that you normally view at. Then just hold down the space bar and your move tool becomes the hand tool and you can drag your layout to see whatever area of it you'd like to. To zoom back out again, just double click on the zoom tool again.
2nd Tip:
Kind of similar to the first tip, but not..
If you want to zoom your layout to fit as large as your screen size will allow. Double click on the hand tool. This is also a helpful short cut for when your layouts get away from you and you have accidentally moved your layout too high up on your screen to be able to resize or minimize it. This shortcut has really saved me a couple of times! :)
Last tip!
Ok. And this one is one of my FAVORITE TIPS!!
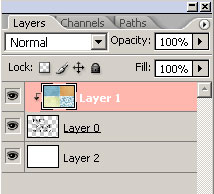
Did you know that your eye dropper tool can be used to sample color anywhere on your screen? You can even sample colors online!! WOOHOO!! To use this little trick. Reduce your Photoshop window so you can see a part of your screen, but still technically be in Photoshop. Click on the eyedropper tool and then click anywhere inside your open photo/layout. Then, without letting go of your mouse; you can drag your eyedropper tool to anywhere else on your screen and sample color anywhere. Pretty Slick.
Woohoo! The sky is the limit! Have Fun!
K. I promise to get better!
I am determined to share my Photoshop knowledge with you all!
SO, to make up for it; Here is a couple of tips in one post :) YEAH!
They are just small, but they can be mighty helpful..
1st Tip:
If you are working on a layout and you need to zoom to view it at 100% a quick and easy way to do that is to double click on the zoom tool. This zooms your image to view it at 100% instead of the measly 15-25% that you normally view at. Then just hold down the space bar and your move tool becomes the hand tool and you can drag your layout to see whatever area of it you'd like to. To zoom back out again, just double click on the zoom tool again.
2nd Tip:
Kind of similar to the first tip, but not..
If you want to zoom your layout to fit as large as your screen size will allow. Double click on the hand tool. This is also a helpful short cut for when your layouts get away from you and you have accidentally moved your layout too high up on your screen to be able to resize or minimize it. This shortcut has really saved me a couple of times! :)
Last tip!
Ok. And this one is one of my FAVORITE TIPS!!
Did you know that your eye dropper tool can be used to sample color anywhere on your screen? You can even sample colors online!! WOOHOO!! To use this little trick. Reduce your Photoshop window so you can see a part of your screen, but still technically be in Photoshop. Click on the eyedropper tool and then click anywhere inside your open photo/layout. Then, without letting go of your mouse; you can drag your eyedropper tool to anywhere else on your screen and sample color anywhere. Pretty Slick.
Woohoo! The sky is the limit! Have Fun!
posted by Michelle at 12:32 PM
112 comments
![]()